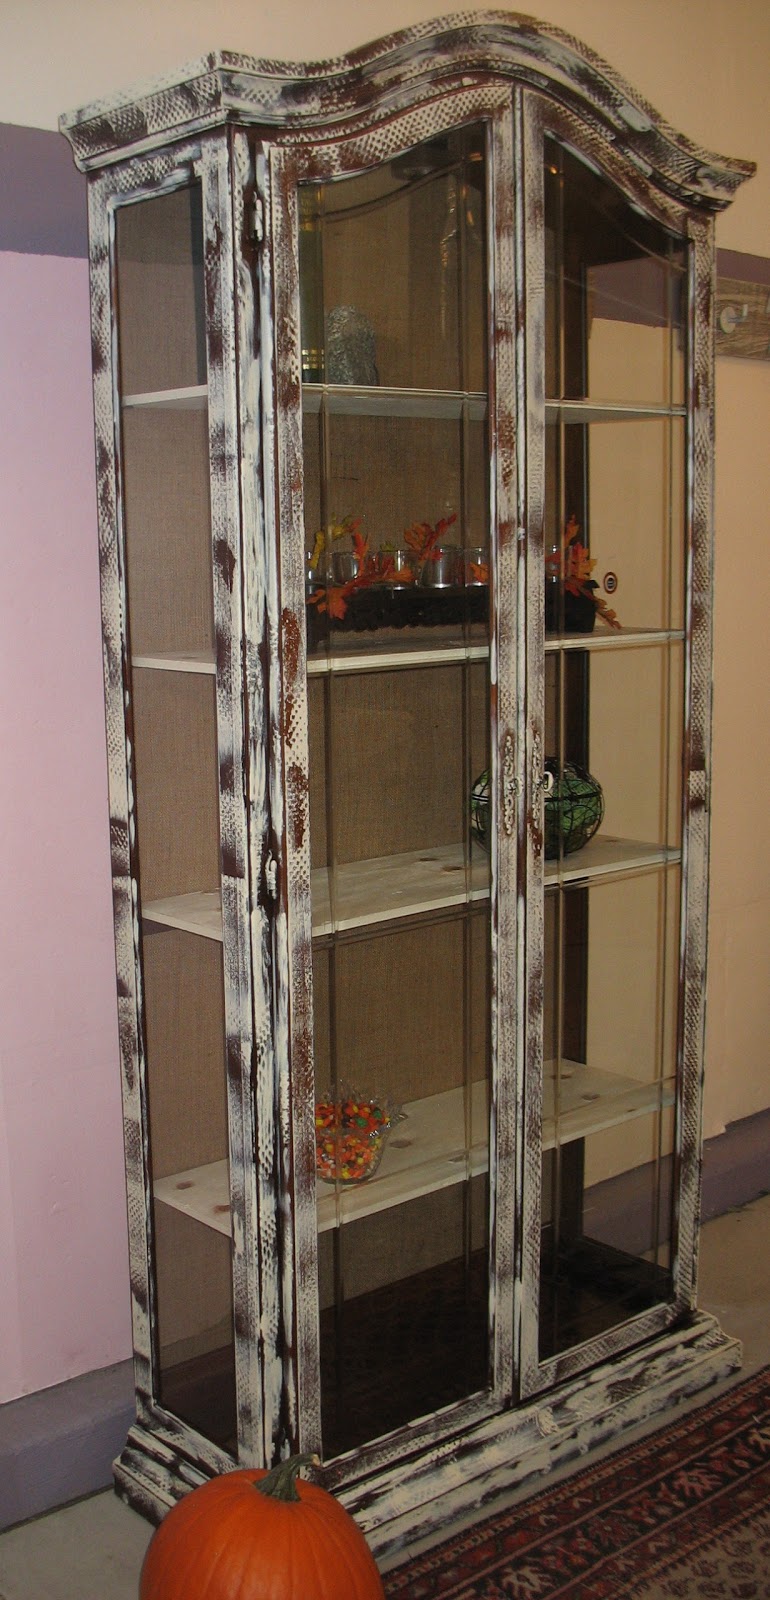
Burlap and Knots Hutch

I was lucky enough to come across a roll of Burlap at a thrift store months ago and then found this Hutch at a garage sale, the poor thing had no shelves, the back was warped and detaching and I did not like the mirror on the back, BUT, this would be bur bur burfect for my roll of burlap!! And it had a working light to show off treasures!
I was dying to take the hutch apart and get started. As far as the knots, well when purchasing my wood for the shelves, I loved all the knots on the plank of wood. At first I painted over them, and that bothered me, so I immediately wiped off my first shelf to reveal those beautiful knots. Yes, I liked that better, now the shelves had a knotty plan for the redo!
Sometimes when you are working on a redo, things just fall into place! This Hutch, I feel is unique and just because I love her, I am not sure the reaction I will get.?
Supplies:

I did not get a picture of the new backing wood sheet or knotty pine plank for my shelves, but here is the story:
The best part was at my Home Depot I bought the backing sheet of wood and the big plank of knotty
pine for shelves and I did not have to cut it, or better yet ask the hubby to do it!
I went prepared, being a girl scout for 5 years came in handy!! I had all the measurements I needed for the shelves and also brought the old warped backing for the hutch right in to them! A few stares, but it is Home Depot! Maybe it was my painting outfit I had on???
Anyway, the nice guy cut all the shelves, listening to me without any slack or trying to tell me what to do, no stress! Now, that would not have been the scene at home with the hubby!!!
I traced out the old backing on the new sheet and he cut the squared amount I needed. Of course, I had to come home and hand cut out the top curving for the hutch, but that was it! Service with a smile!!!
before


 |
| You can see the mirror on the back in this shot! Well that is coming OUT! excuse the mess, working area! Now for the AFTER I did take a few :)                 Thanks for visiting, take care, Marilyn Linking to: http://www.funkyjunkinteriors.net/2013/05/party-junk-185-burlap.html |
11 comments:
love how this turned out , beautiful, and i love the way you used the burlap!
What a find! Fantastic job on saving her! Thank you for the visit, the sweet comment, and of course the follow @TheDedicatedHouse. It means the world. Giving you back some love. Have a grand day. Toodles, Kathryn
You really had a vision when you found this. I would have said, "too much work" but fortunately you saw it's potential. Love the burlap in back. I kind of have a crush on burlap :)
Thank you for sharing it at my first of I hope, many parties.
Enjoy the weekend.
Hi, and thanks for visiting! I see you are a furniture makeover queen, so I am following you too. I like the burlap backing and rustic finish on this piece. Enjoy your weekend!
Beautiful Transformation! I love working with burlap! It looks great in your hutch!
Great project, like the burlap backing!
Great find! I love the burlap backing. This would be so cute painted with the new chalk paint too!
That turned out great! I'm your newest follower!
I love the burlap back! The paint looks great too. I'm a new follower. Looking forward to seeing more of your transformations!
Wow, this turned out so great! The burlap was a great touch.
Great job! LOVE it!
Post a Comment